Wednesday, August 31, 2011

Now for Something Completely Different...I am a Thinker!!!

Thanks to everyone who is following my blog.  You interest has taken me from being a Commentator to a Thinker. 


I suppose I should quit thinking about painting some figures and get some painted so I can add some new posts.  Thanks to everyone who helped make this happen by following my blog, but special thanks to Andrew Beasley for being the 40th person to follow my blog.

I am sure you are all trusting me to become more expert so I can reach the next level of "Maven".  :)

Thank goodness it wasn't a man with three buttocks.  Thanks for reading...


Copyright © Ron Hamilton 2011, All Right Reserved.

Sunday, May 1, 2011

How to Base Figures with Washers

When it comes to basing for my 1/72 figures, I prefer using washers.  The washers give the finished figures added weight and stability,  The washers also allow for using magnetic tape to store my figures.  The only problem is gluing the vinyl figures to the metal and making them stick.  I solved this problem using Loctite Activator, and plastic card to make a strong bond.


(Click on the image for a larger version)
I use a 3/4 inch circular paper cutter to clip small pieces of plastic card.  I clip the pieces large enough to cover the hole in the center of the washer but not so large it hangs over the edge of the washer.


(Click on the image for a larger version)
I next glue the plastic card in place using super glue.  Once the glue is dry it is time to glue the figures in place.


(Click on the image for a larger version)
I then apply Loctite Activator to the plastic card and the bottom of the figure.  I allow the pieces to dry for at least a minute (that is why the activator pen above has a picture of a red stop hand with 1 minute on it).  I then apply a couple of drops of super glue on the plastic card and then put the figure on top.  As soon as the super glue is dried the figures are ready to finish basing.


(Click on the image for a larger version)

I have taken to using Ceramic Tile Caulk to add texture to my bases.  I use a caulking gun to dispense a glob of the caulk onto some junk mail or other disposable stuff.  I then use a toothpick or old craft knife to trowel the caulk on to the figures base.  This caulk has the texture of normal tile grout, but it is flexible when it is dried since it is made of latex caulk.  I also like the fact that after it has dried for 15 minutes the caulk forms a skin on the surface.  At this point, you can sculpt the surface into any shape you like since the caulk below is still soft.  You can use your finger tips to make it really smooth or a tooth pick to rough it up.  The more I play with it the more I learn new ways to get different effects.


(Click on the image for a larger version)
If I have a slotta figure instead of ones with a flat base, I use the technique pictured above.  I then seal up any remaining gaps with plastic card and apply Ceramic Latex Caulk.

Questions and comments are always welcome. Thanks for reading...


Copyright © Ron Hamilton 2011, All Right Reserved.

Monday, March 21, 2011

How to Prime Plastic Figures

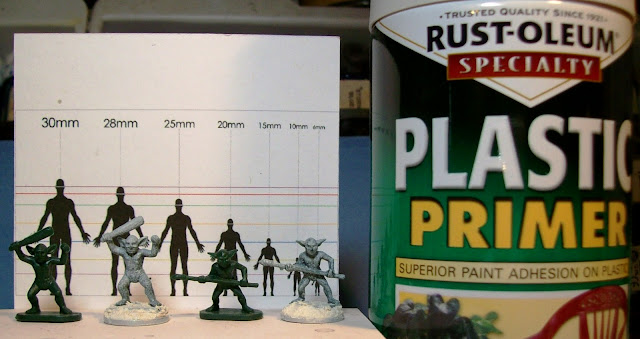
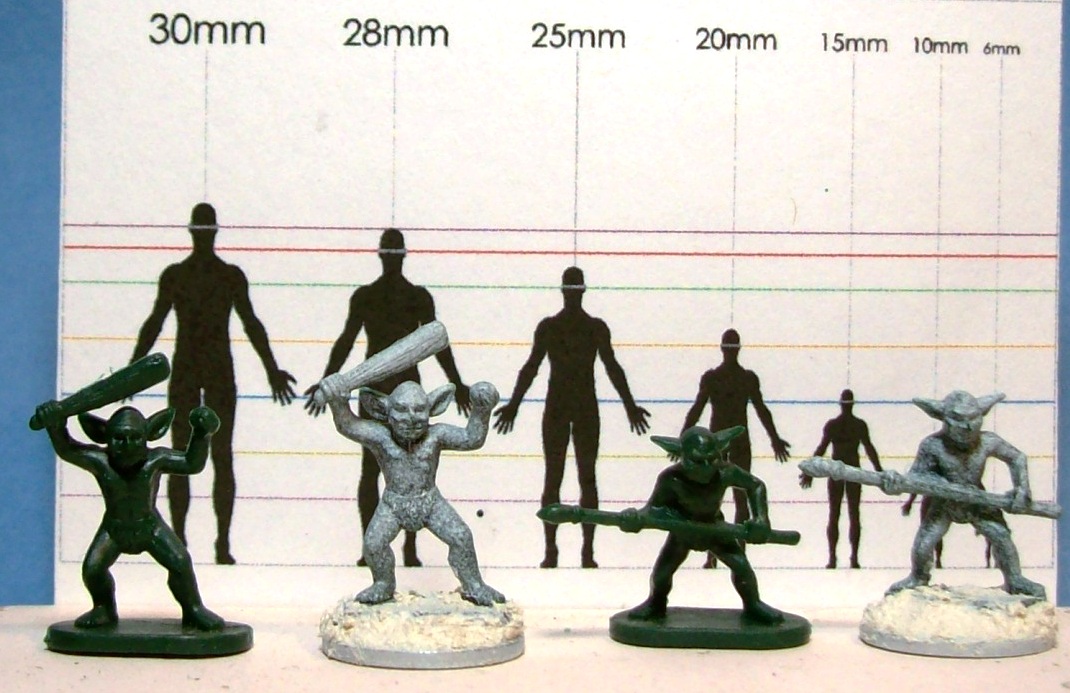
I have tried several methods for priming plastic figures before I settled on this method.  It is not the fastest method I have ever used to prime figures, but since I started using it in 2008, I have had zero flaking or chipping from any of the figures so primed.  It relies on thin coats of flexible paint to prevent chipping and flaking.  I have included copies of the unpainted figures in my photos to compare to the ones being primed.

I start by wash my figures with hot soapy water, rinse them well with hot water, and make sure they are completely dry. I then mist the figures with a light coat of white Rust-oleum Plastic Primer.  The directions say to prepare new plastic by wiping it down with paint thinner, I have never bothered to do this step and it seems to work perfectly without doing it.

(Click on the image for a larger version)
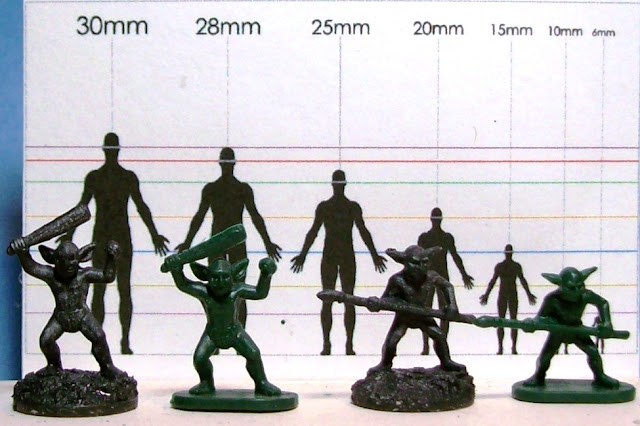
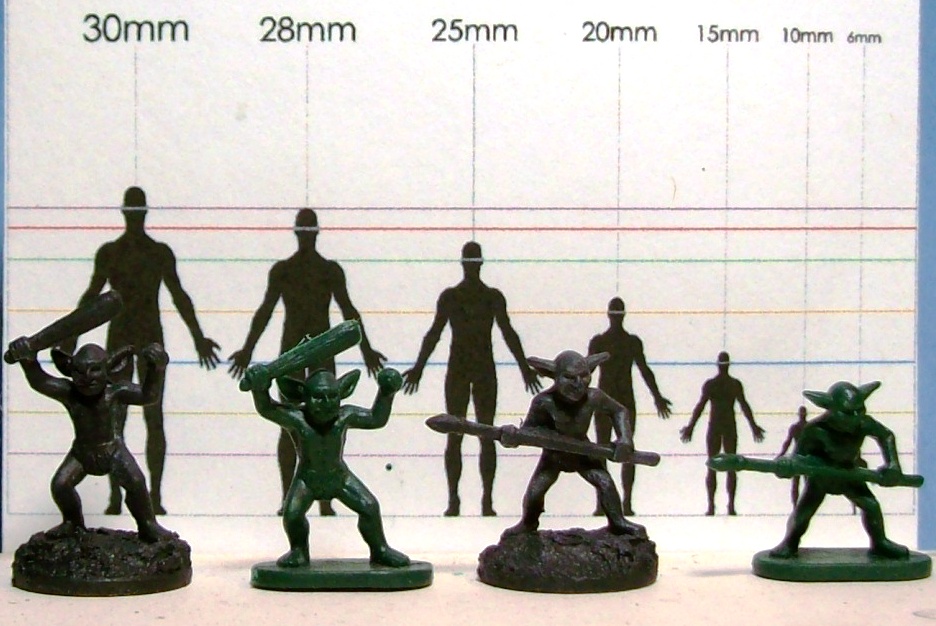
Enlarge the photo below to see how much paint I try to apply.  The most important part of this step is to ensure the spray primer is not applied too thickly.  Rust-oleum Primer if applied too thickly will still flake.  Thin coats are the trick. Once the figure is dry, I take a soft toothbrush and buff the figures gently.  It removes loose paint, smooths out the coat, and tests to make sure the paint that will not rub off or flake.

(Click on the image for a larger version)
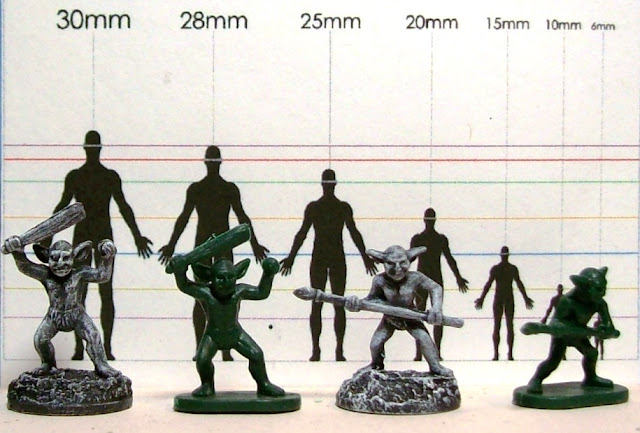
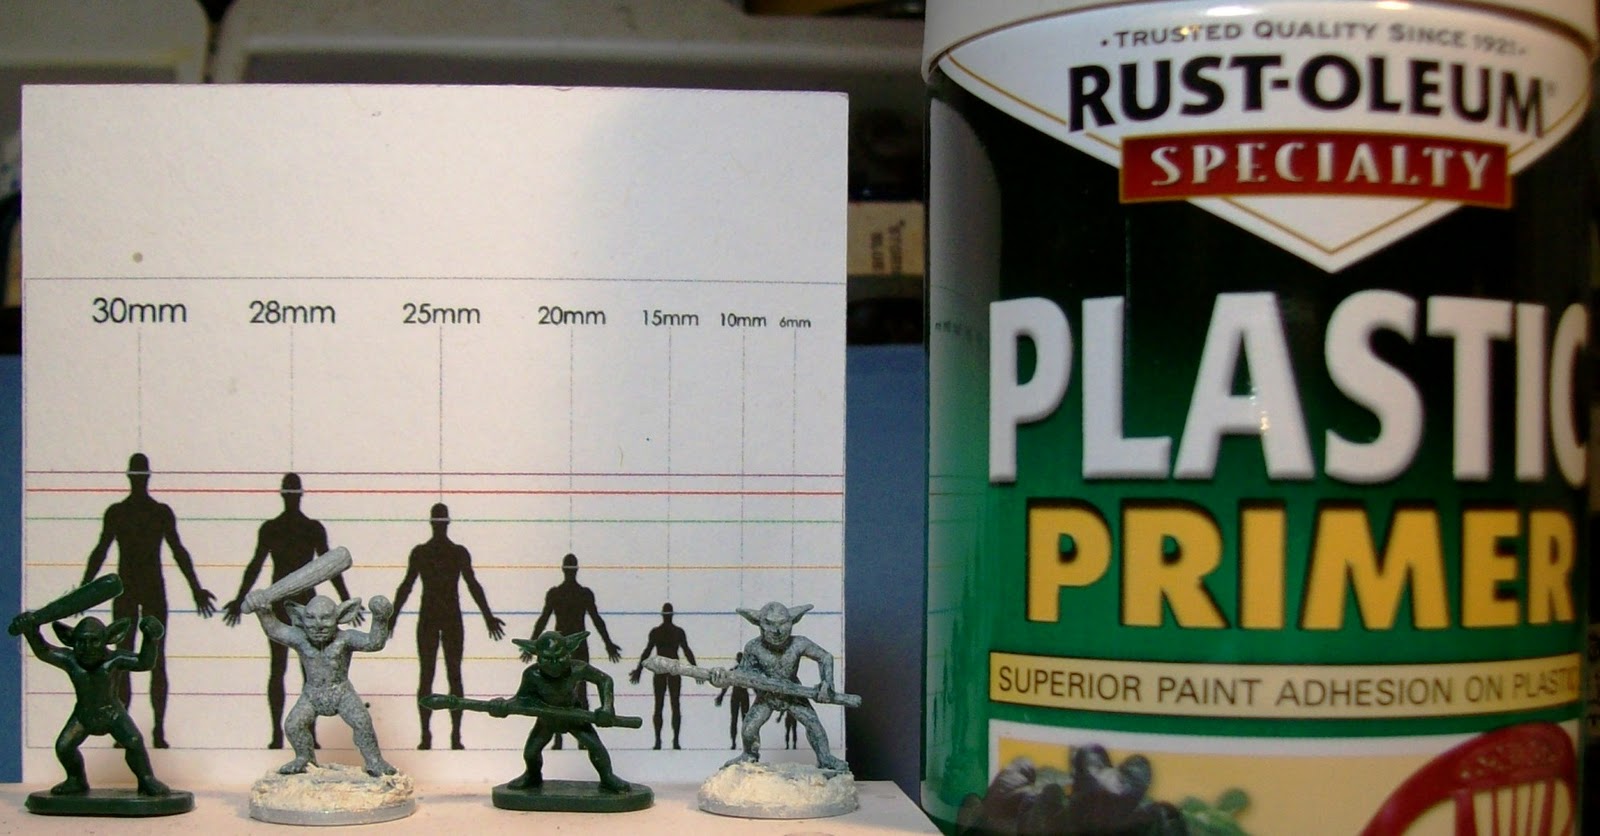
I then apply a thin coat of undiluted flat black latex house paint.  I use just a few drops of paint per figure.  I work it out into a thin coat.  I use a cheap paintbrush with medium thickness plastic bristles to apply the paint, the sort of paintbrushes you give kids to do arts and crafts projects.  If you look at the picture below you can see the white spray coating showing through on the figures.  Again, you are trying for a thin coat of paint not complete coverage with this coat.  Once dry, I give it another buffing with the toothbrush.

(Click on the image for a larger version)
I then apply one more thin coat of latex paint.  You can see this thin coat of paint has gotten rid of the white undercoat that was visible.  After drying, I brush down the figure with the toothbrush again.  The figures are now primed and are ready to paint.

(Click on the image for a larger version)
I have one last optional step when priming my figures,  I dry brush the entire figure with white paint to bring out the details to aid me in the rest of the painting progress. After dry, I will take the toothbrush to the figure one more time. 


(Click on the image for a larger version)
The figures are now completely primed and ready to be painted.  At this point, I sometimes use a watered down paint or ink base coat color.  Since that coat is translucent the shading given by the dry brushing shows though and gives nice shading effects with no more work than a normal base coat would take to apply, I will post another how to article later on this technique.

The important thing to remember about my priming technique is it is based on thin coats of paint.  The spray primer bonds to the plastic, and the latex paint forms a coating that grips the spray primer while acting as a flexible skin that can move with the figure if it is bent or flexed.  Thick coats of paint that cannot flex when the figure moves tend to crack and then flake off of the figure.  I have been using this technique since 2008 and have yet to have any figure so painted chip or flake.

Questions and comments are always welcome. Thanks for reading...


Copyright © Ron Hamilton 2011, All Right Reserved.

Tuesday, March 15, 2011

Now for Something Completely Different...I am a Commentator!!!

I was looking around for some info to share with a young role player looking to start game mastering and instead found the Old School Level Advancement for Bloggers.


Thanks Trey for creating it and giving me a laugh out loud moment when I found it.  I am now shooting for "Thinker".  I guess I need to get thinking and generate some new content to reach my next level.  :)

Thank goodness it wasn't a man with three buttocks.  Thanks for reading...


Copyright © Ron Hamilton 2011, All Right Reserved.

Tuesday, February 15, 2011

Project Cave Kraken

Cave Kraken, Watcher in the Water, Cthulhu, or whatever you call it, every one needs a tentacled beasty to lie in wait for unsuspecting adventurers.  I'll start by showing a picture of the completed project.  As usual, Friar Tuck (an Airfix Robin Hood set figure) and Conan (a Caesar Miniatures Adventures set figure) make their appearance for scale, as well as the Scale Picture (the scale picture).

(Click on the image for a larger version)
This project was a lot of fun.  It began when I saw a tube of plastic kids toys at Hobby Lobby.  I found a cute pink octopus inside the tube, at least it was cute on the outside, I could sense the evil inside just waiting to be released.  The picture below shows the contents of the tube and the red circle give you a glimpse of how the octopus looked before being converted to the Kraken.

(Click on the image for a larger version)
I took an Exacto knife to the octopus and chopped off all of the tentacles.  I then glued the body to the base.  I took a small bit of tentacle and glued the small loop of tentacle in front of the main body.  Next I  added an armored plate from a GW Tyranid sprue and sculpted the beak.  The beak worked out perfectly, it looked exactly as I pictured it in my head.  I then glued some of the left over tentacles to separate bases and it was ready for the basing.  I sculpted the waves on the bases out of paint-able latex caulk.  I attempted to sculpt some white capping waves as the kraken and his tentacles rose from the depths, and again, I lucked out because the looked exactly as I had hoped.

(Click on the image for a larger version)
I then painted the little beasty various shades of purple and blue for the body, yellows and tans for the beak, light blues for the suckers, and green for the eyes (he just seemed to be the jealous type).  The water was primed black, dry brushed white, and then painted with several different colors of diluted ink to achieve a water effect.  I then touched up the white caps with some white paint.  The last step was to give him a gloss coat of sealant, so he would appear to be wet

(Click on the image for a larger version)
Here is what the cave Kraken looks like on the game board when he rises from the depths of the "Well of Doom".  You know the dwarfs are wondering who ordered calamari  and are hoping they are not on the menu.

(Click on the image for a larger version)
It is amazing what a little time and effort can do with a humble toy.  From cute to killer in nothing flat.

Questions and comments are always welcome.  Thanks for reading...


Copyright © Ron Hamilton 2011, All Right Reserved.

Tuesday, February 8, 2011

Minatures Scale Picture by Christopher B of the blog "A Rust Monster Ate My Sword"

I use a miniature scale picture in lots of my blog entries.  I think it is very handy to see how different figures match up against it.  As usual, Friar Tuck (an Airfix Robin Hood set figure) and Conan (a Caesar Miniatures Adventures set figure) make their appearance for scale, as well as the Scale Picture (a scale picture).

(Click on the image for a larger version)

You may one one of your own, if so, do not despair.  All you need to do is to click on the Miniature Scale Picture link and you can have one of you own.

          Miniature Scale Picture

The picture looks way to big when viewed in your browser window, but due to the magic of a 300 dots per inch setting hidden deep in its JPG soul, it prints out perfectly.  I printed mine using Windows Paint.  If you would like to visit the blog of the fellow who created this neat little gadget, click the link below. 

          A Rust Monster Ate My Sword

Thanks Christopher B. for creating such a useful little picture.  I have a laminated copy I keep in my wallet for those time when I wonder, "Will this work with scale X figures."


Thanks for reading...


Copyright © Ron Hamilton 2011, All Right Reserved.

Saturday, February 5, 2011

Project Legolas

I created my 1/72 version of Legolas in January of 2007.  I was looking at the up coming Caesar Fantasy lines, that didn't come out until the end of 2007, and I just got impatient.  The front and back of the completed figure can be seen below with Friar Tuck (an Airfix Robin Hood set figure) and Conan (a Caesar Miniatures Adventures set figure) making their appearance for scale. 

(Click on the image for a larger version)
I chose the Hat/Airfix Merry Man's body on the right because it has the best gear and a nice dynamic arrow shooting pose, but his bearded face would never do for an elf.  So I used a bald head from another Merry Man like the one on the left and did a head swap.  At this point you may be asking yourself , a bald elf will not work any better than a beardy one.  I have to admit the logic is sound, but since I planned to sculpt on pointy ears and longish hair adding hair plugs for the bald head didn't seem to be a problem.  As you can see I also added a quiver of arrows, an arm guard, and high boots, when I sculpted on his ears and hair.  The end result was an acceptable elf figure.

(Click on the image for a larger version)
I decided to post this after reading Paul's Bods Blog about Airfix Robin Hood figure head swaps.  Thanks to Paul for the motivating me to showing off my first plastic 1/72 fantasy figure. 

Thanks for reading...


Copyright © Ron Hamilton 2011, All Right Reserved.

Tuesday, February 1, 2011

Project Hobbit - Phase 3

I have completed priming and putting the base coat on my hobbit.  So far I am happy with how he is turning out.

I started the priming with a light coat, almost just a misting, of Krylon Plastic Primer.  I include this shot just to show how much spray primer I apply.  I like to use light coats of paint when painting plastic figures.  I find if you get the coats of paint too thick it tends to flake too easily.  As  usual, Friar Tuck (an Airfix Robin Hood set figure) and Conan (a Caesar Miniatures Adventures set figure) make their appearance for scale.  Also making an appearance in the blog is a Caesar Miniatures Adventurers set female fighter figure.  I have replaced her sword with a war hammer and primed her with Krylon spray primer.


(Click on the image for a larger version)

In the next picture, I have applied two coats of black latex house paint.  I find it adheres well to the Krylon spray primer and the latex paint has some flex and give if the plastic figures are bent.  I also take a soft bristled tooth brush and buff the figure between coats of paint.  The buffing smooths the primer between coats, sort of the way you can sand primer between coats when painting a car.  It also tests the bond between the primer and figure early in the painting process.  I hate to finish painting a figure only to find out the primer failed to bond.   


(Click on the image for a larger version)
I then applied a base coat.  The picture below speaks for itself.  I did try to paint some yellow trim on the green vest.  It seemed like a good idea, but I do not really like the effect.  I think I may change it when I start painting highlights and details.  Even if I just leave the vest plain with no trim it should look good on the table top.


(Click on the image for a larger version)
I have included a shot of the back of the figure, to give a complete view of the base coating process.


(Click on the image for a larger version)
I am looking forward to doing the detail painting and putting a protective finish on this little guy so he is ready for the table top.  So it is time to quit writing and go back to painting. 

Thanks for reading...


Copyright © Ron Hamilton 2011, All Right Reserved.

Thursday, January 27, 2011

Project Hobbit, Phase 2

I broke out the green stuff and started sculpting.  I started with the nickers and worked my way up.  The shirt  was easy, but he looked sort of plain so I added a vest.  At first it looked like he was wearing a life vest, but since hobbits don't swim, I removed a bit of green stuff and reworked it. 

(Click on the image for a larger version)
With the mistake on adding extra green stuff on the front, I did not add any so it moved along much quicker.

(Click on the image for a larger version)
Next I took a straight pin and forged my little new little adventurer a 1/72 version of "Sting".  If anyone would like to have me explain the "forging" process, it is easy to do and gives consistent results.

(Click on the image for a larger version)
Just to be complete I included a shot from behind with the added sword.  It may be overkill, but once the camera is set up snapping extra shots is pretty easy.

(Click on the image for a larger version)

Next to prime and paint the little guy but that will be another blog entry.  Thanks for reading...


Copyright © Ron Hamilton 2010, All Right Reserved.

Wednesday, January 26, 2011

Project Hobbit, Phase 1

I have recently been running the guys from our local game group in a dungeon.  The old school AD&D sort just so they will know how us old grognards did it in the day.  :-)  I rolled up some characters and I thought I needed a halfling (hobbit) thief to get the right flavor for the party.  Only one major hitch, no 1/72 hobbit are to be found.  Being an inventive sort, I realized "Caesar Goblins" should be hobbit size.  I came up with a plan.  I head swap the goblin head for a smallish human one, sculpt on some clothing and gear, and add a short sword and Project Hobbit was born!

(Click on the image for a larger version)

One more quick size comparison with a Caesar Dwarf so that you can see if he will look Hobbitish enough when hanging out in the local dungeon with all the other cool adventurers smoking pipes.  :-)

(Click on the image for a larger version)

As usual, Friar Tuck (an Airfix Robin Hood set figure) and Conan (a Caesar Miniatures Adventures set figure) make their appearance for scale.  I have included a "Caesar Goblin" with no modifications and a the converted one.  The head was taken from a Victorian era British soldier who was more then happy donate it to such a good cause.   Below is the lucky trooper twin broth celebrating his brother new body.

(Click on the image for a larger version)

I have coated the body in supper glue where the clothing and gear will be covering the noble Hobbit.  I am hoping the super glue will give some purchase for the green stuff.  My previous experiments with green stuff directly to vinyl have been slowed when the green stuff would not properly grip the slippery vinyl.  

Next time, I hope to have the conversion finished and ready for the paint table.  Wish me luck, and thanks for reading...


Copyright © Ron Hamilton 2011, All Right Reserved.